Basics of Color
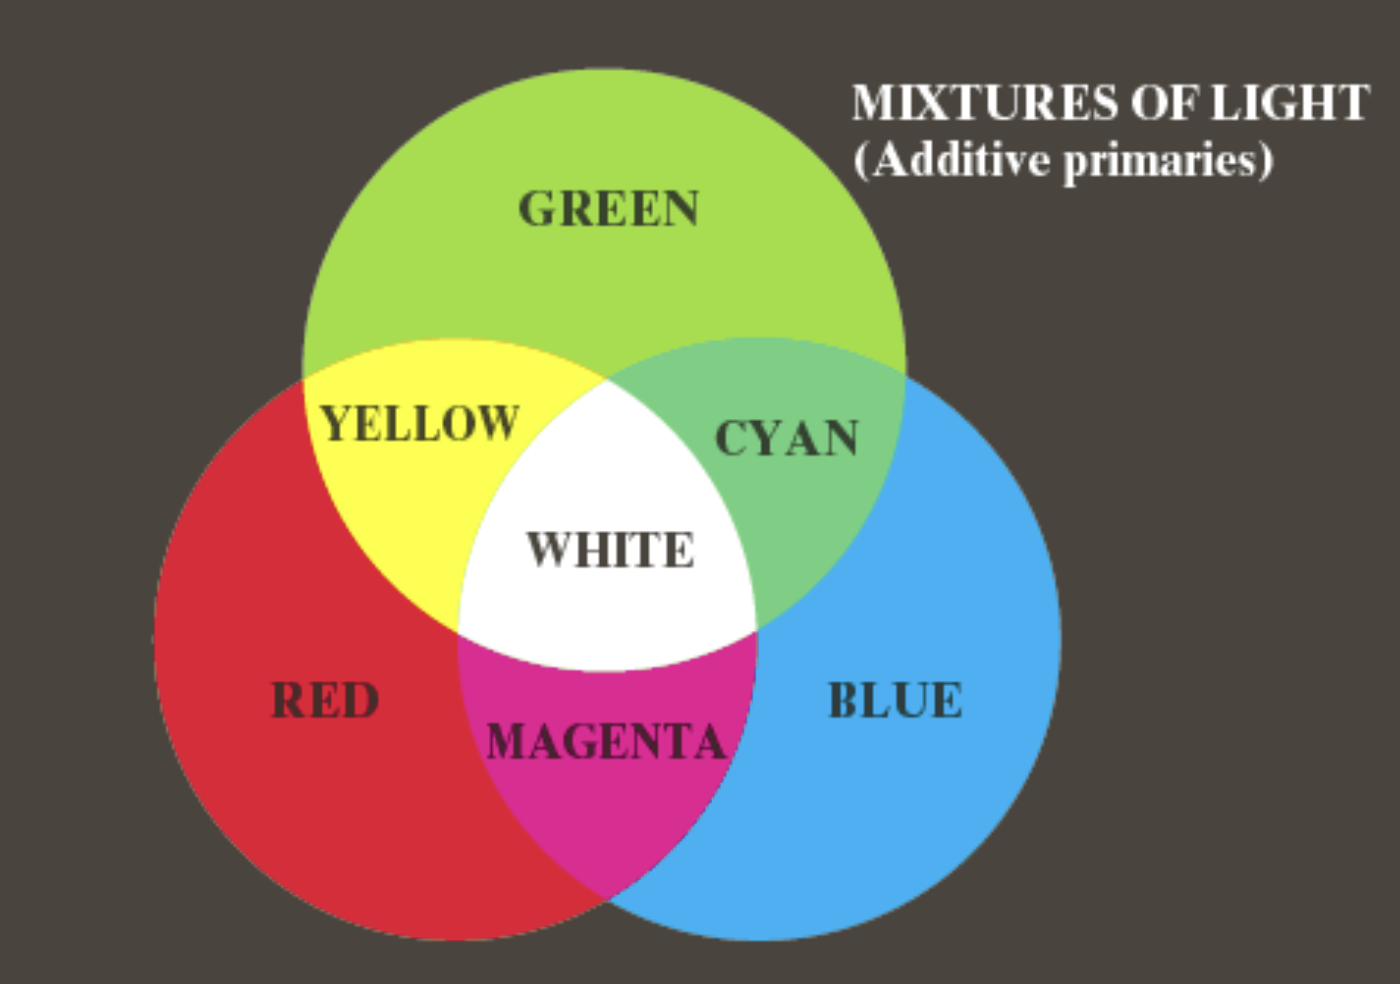
Primary Colors of Light
Red, Green, Blue 빛의 3원색 조합으로 모든 색을 만들 수 있다.
Secondary Colors of Light
- Magenta = R + B
- Yellow = R + G
- Cyan = G + B
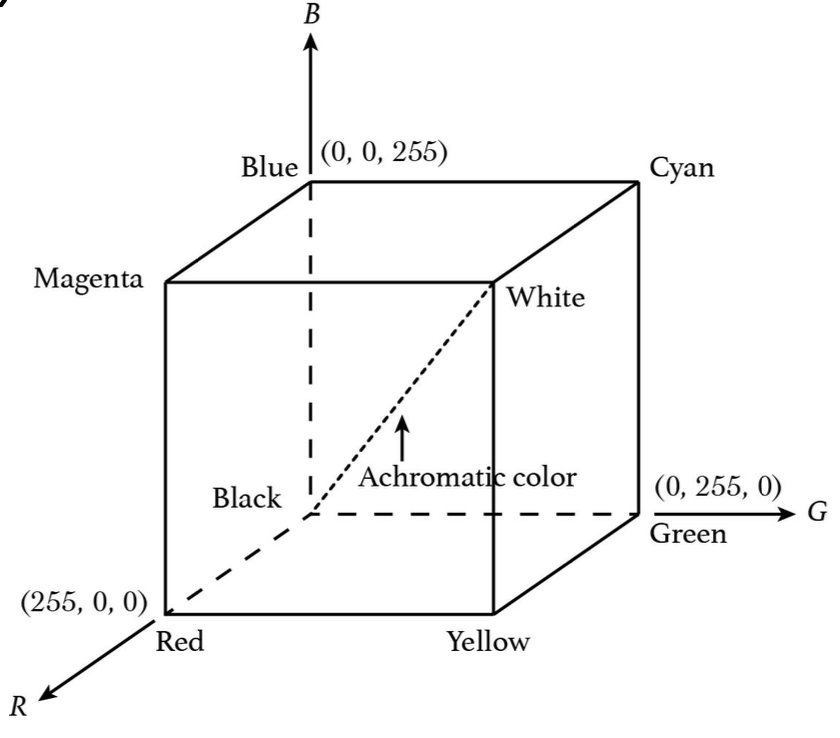
Achromatic Color (무채색)
- 색이 없는 상태 (Gray Scale)
- RGB 각 성분 비율이 동일할 때 무채색이 된다.
- ex) (100,100,100), (255,255,255)
Color Models
RGB
R채널, G채널, B채널로 이루어짐
각 채널마다 [0, 255] 범위
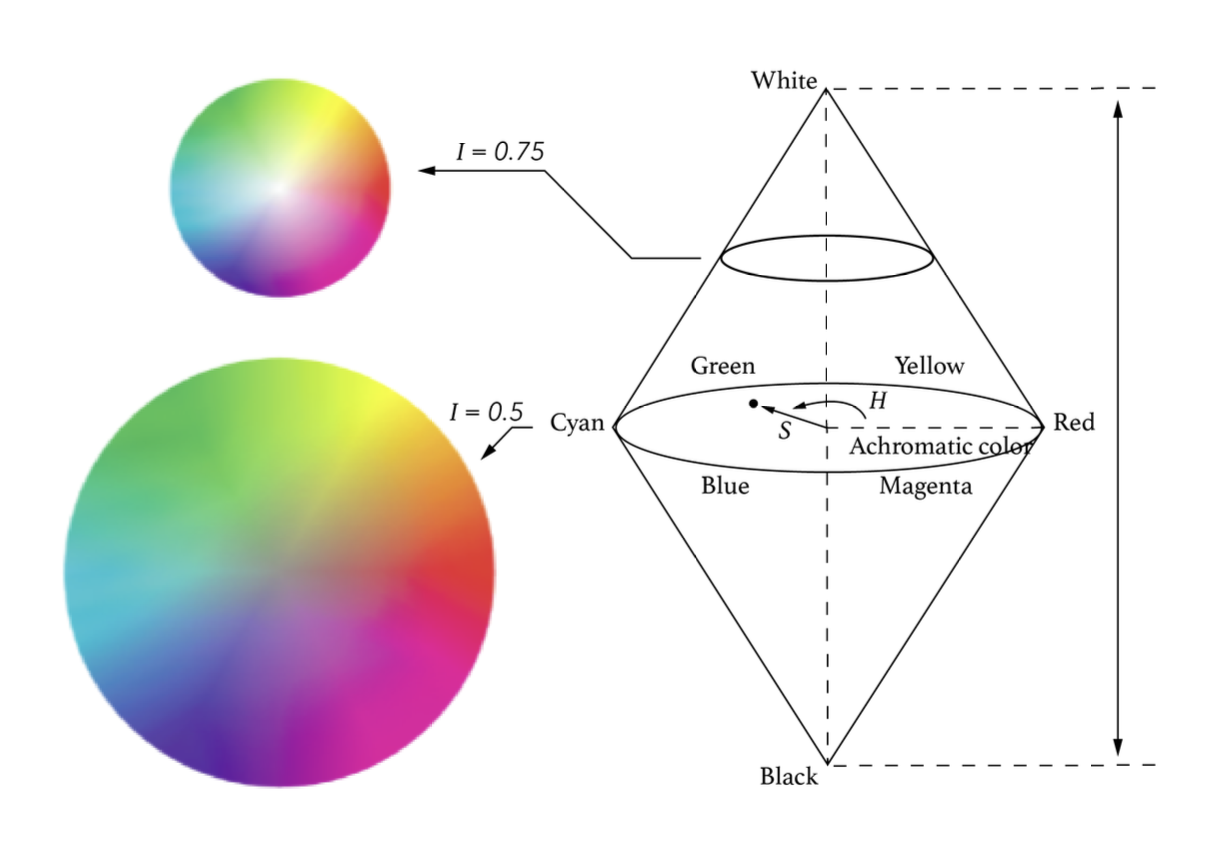
HSI
Hue채널, Saturation채널, Intensity채널로 구성
- Hue (색상): 파장에 따른 지배적인 색
- Saturation (채도): 색의 선명함, 값이 클수록 뚜렷한 색
- Intensity (명도): 밝기, 빛의 세기
HSV 모델과 유사
각 채널 값의 범위
0 < H < 3600 < S < 10 < V < 1
OpenCV에서는
H/2 (0 < H < 180)255*S (0 < S < 255)255*V (0 < V < 255)
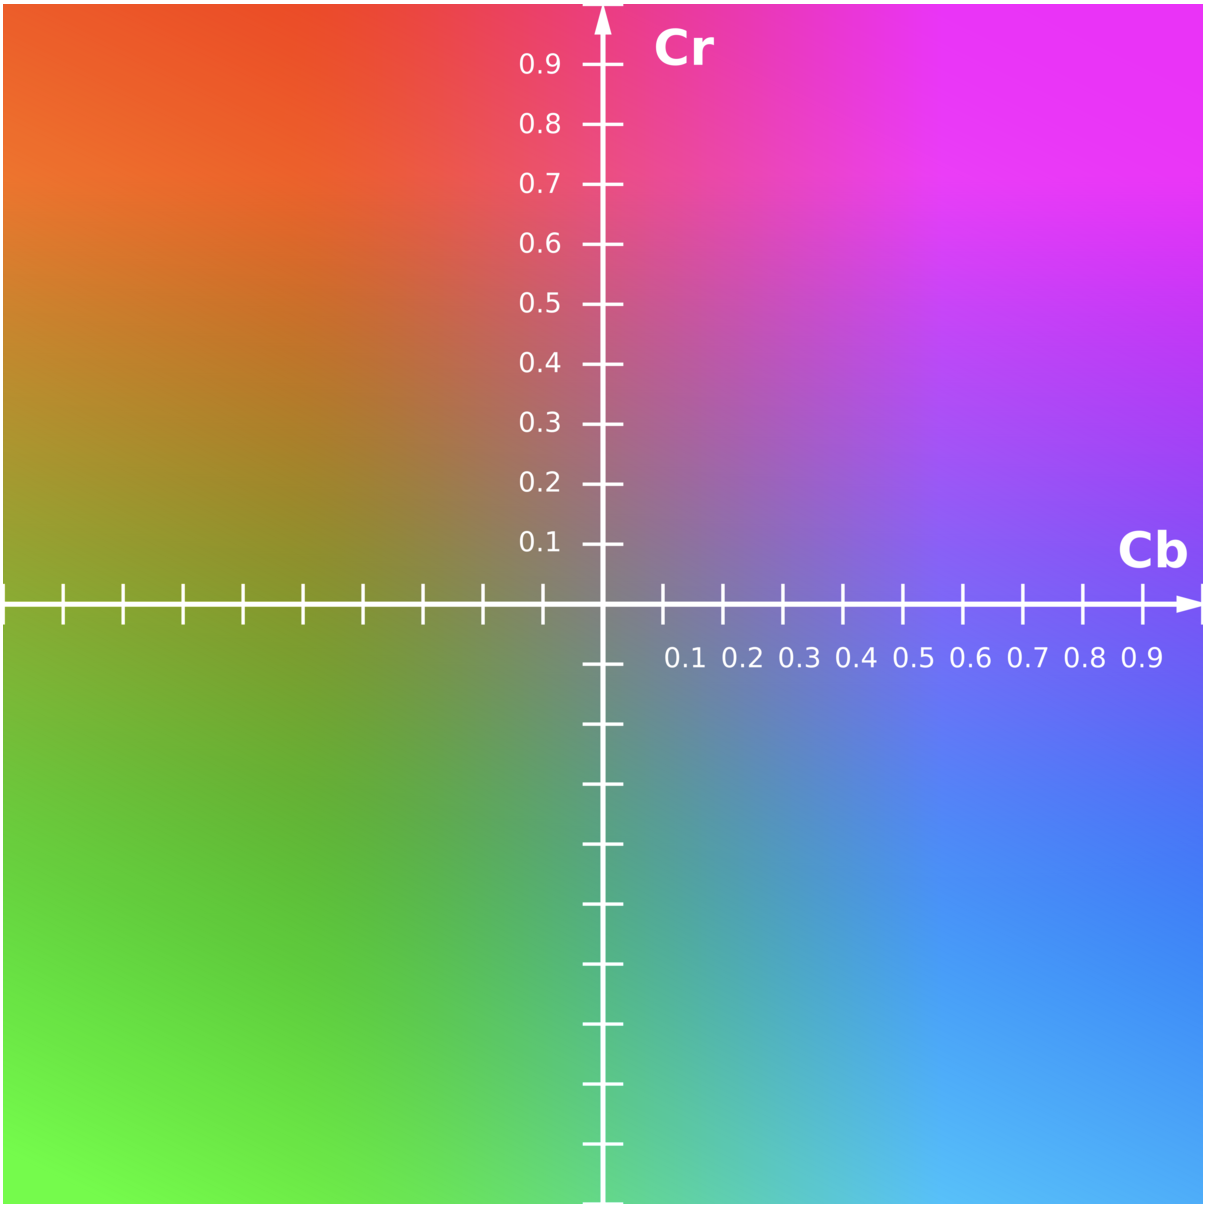
YCbCr (YUV)
- Y : 밝기
- Cb : 파란색 성분과 밝기의 차이 (B-Y)
- Cr : 붉은색 성분과 밝기의 차이 (R-Y)
Grayscale
밝기 값 채널 1개만 존재한다.
Hue, Saturation 값은 0이다.
Color Image Processing
앞서 배운 2_Week_Intensity_Transformation , 3_Week_Histogram Equalization 등 을 컬러 이미지에 적용하려 할때,
RGB 모델을 수정하려 하면 R, G, B 각 채널의 비율 변화로 색이 왜곡될 수 있다.
따라서 HSI, YCbCr로 색공간을 변환 후에 Intensity 채널만 따로 처리해야 한다.
Usage of HSI
분리된 Intensity로 색을 유지하며 영상의 밝기만 조절 가능하다.
Color Slicing
Hue 채널에서 특정 색 영역의 픽셀만 추출하고
다른 색은 Saturation 채널의 값을 0으로 설정하여 원하는 색만 강조 할 수 있다.
Color Conversion
Hue 채널 값에 접근하여 특정 영역의 색상을 다른 색으로 변환할 수 있다.
Pseudo Coloring
인간의 눈은 회색 음영은 30-50 단계만 구분할 수 있지만 색은 100k ~ 10m 가지까지 구분가능하다
회색 영상에 색을 입히면 훨씬 많은 정보를 확인할 수 있다.
Color Scale을 함께 포함하여 색이 어떤 의미인지 이해할 수 있도록 해야 함
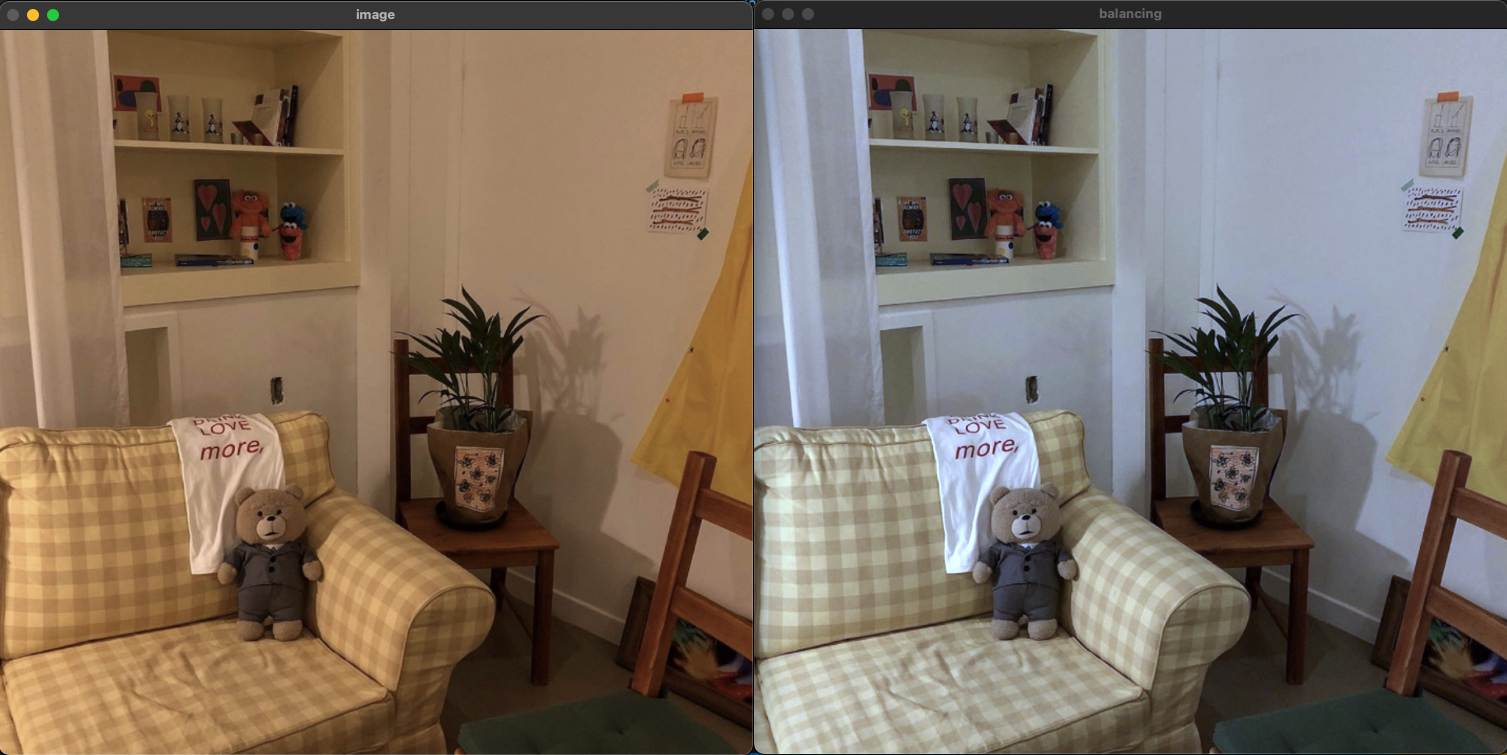
White Balancing
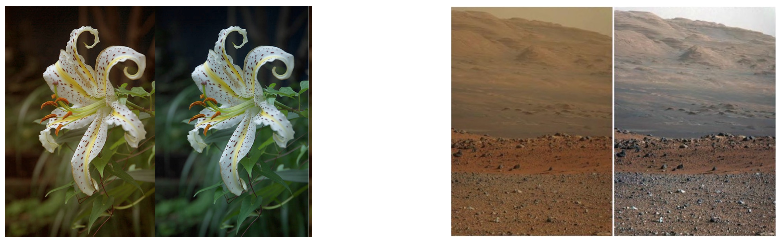
컬러 영상의 전반적인 색 intensity를 조정해 흰색인 물체가 실제로 흰색처럼 보이게 만드는 과정
간단한 방법
- (, , ) : 화이트 밸런싱 이전 원래 값
- (, , ) : 화이트 밸런싱 이후 값
- ( , , ) : 흰색이라고 생각되는 기준 픽셀의 값
Color Checker 사용
표준 색상표를 참고해서 조정할 수 있다.
Estimate white color
이미지 속 특정 영역을 흰색이라고 가정하고 보정한다.
Gray World Assumption
색 밸런스가 좋은 사진은 모든 픽셀 색상의 평균값이 중립 회색에 가까울 것이라는 점을 기반으로 전체 색상을 보정
소스 코드 예제
Color Space Conversion
void cvtColor(Mat src, Mat dst, int code, int dstCn =0);code: 변환에 사용할 색상 공간 변환 코드COLOR_BGR2GRAYCOLOR_BGR2HSVCOLOR_BGR2HLSCOLOR_GRAY2BGRCOLOR_BGR2RGB
dstCn: 출력 이미지의 채널 수를 지정, 기본값은 0으로code에 따라 자동 결정
example
int main() {
	Mat image, image_YUV;

	image = imread("image.png");

	return 0;
}
Split / Merge
Split
multi-channel 을 여러개의 single-channel 로 분리
void split(Mat src, Mat* mv);Merge
여러 개의 single-channel을 하나의 multi-channel 로 병합
void merge(const Mat* mv, size_t count, OutputArray dst);또는
void merge(InputArrayOfArrays mv, OutputArray dst);Example
void testSplitAndMerge() {
Mat image, image_YUV, dst;
Mat yuv_channels[3];
image = imread("lena.png");
cvtColor(image, image_YUV, COLOR_BGR2YUV);
split(image_YUV, yuv_channels);
merge(yuv_channels, 3, dst);
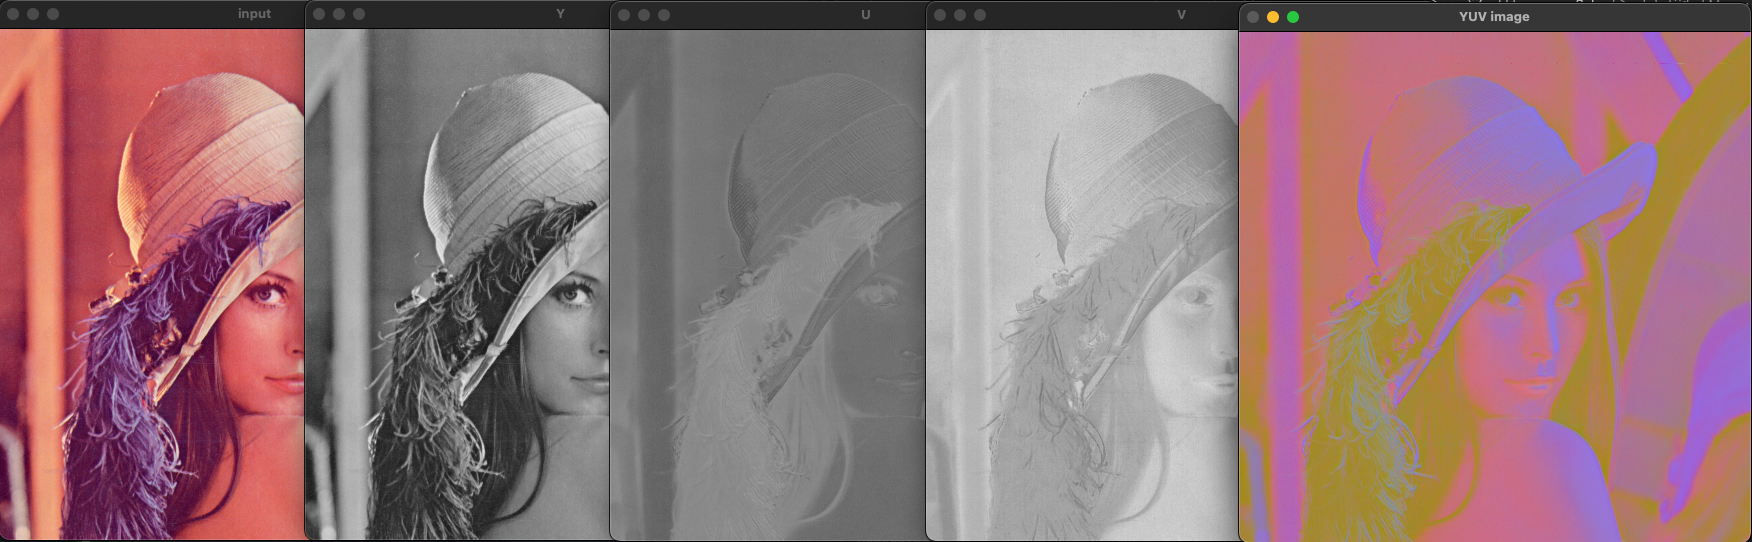
imshow("input", image);
imshow("Y", yuv_channels[0]);
imshow("U", yuv_channels[1]);
imshow("V", yuv_channels[2]);
imshow("YUV image", dst);
waitKey(0);
}YUV 채널들을 merge() 한 결과가 이상한데, 이는 imshow() 함수가 BGR 로 이미지를 출력하기 때문
Color Processing
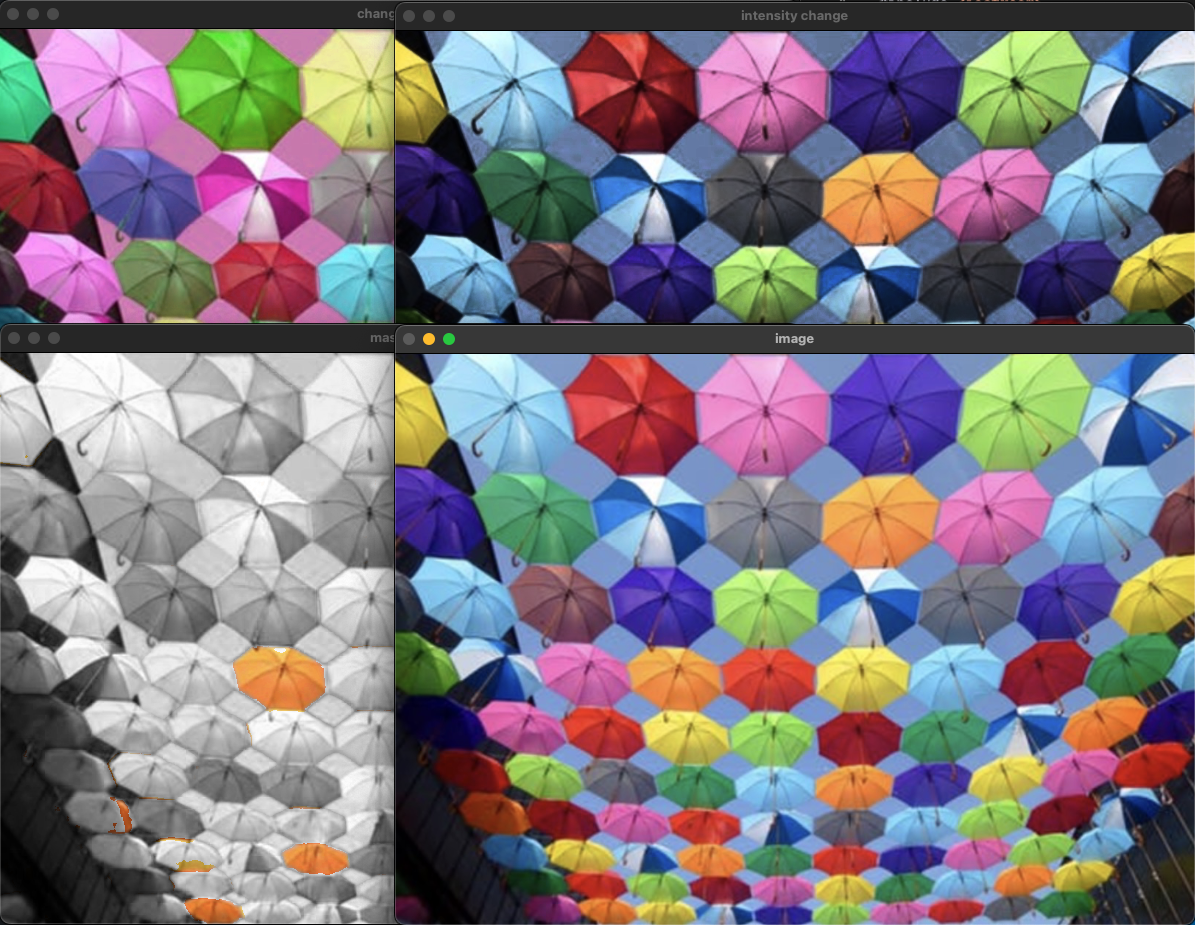
Usage of HSI
Example
void testHSI() {
  Mat image = imread("colorful.png");

  Mat HSV, intensity_change, mask_out, change_color;

  vector<Mat> ic(3);
  vector<Mat> mo(3);
  vector<Mat> cc(3);

  int rows = image.rows;
  int cols = image.cols;

  uchar* h;
  uchar* s;
  uchar* v;

  cvtColor(image, HSV, COLOR_BGR2HSV);
  split(HSV, ic);
  split(HSV, mo);
  split(HSV, cc);

  // histogram equalize
  equalizeHist(ic[2], ic[2]);

  // masking out except orange
  for (int r = 0; r < rows; r++) {
    h = mo[0].ptr<uchar>(r);
    s = mo[1].ptr<uchar>(r);

    for (int c = 0; c < cols; c++) {
      if (9 < h[c] && h[c] < 23) {
        s[c] = s[c];
      } else {
        s[c] = 0;
      }
    }
  }

  // changing all colors
  for (int r = 0; r < rows; ++r) {
    h = cc[0].ptr<uchar>(r);
    s = cc[1].ptr<uchar>(r);

    for (int c = 0; c < cols; ++c) {
      if (179 < (h[c] + 50)) {
        h[c] = h[c] + 50 - 179;
      } else {
        h[c] += 50;
      }
    }
  }

  merge(ic, intensity_change);
  merge(mo, mask_out);
  merge(cc, change_color);

  cvtColor(intensity_change, intensity_change, COLOR_HSV2BGR);
  cvtColor(mask_out, mask_out, COLOR_HSV2BGR);
  cvtColor(change_color, change_color, COLOR_HSV2BGR);

  imshow("image", image);
  imshow("intensity change", intensity_change);
  imshow("mask out", mask_out);
  imshow("change color", change_color);

  waitKey(0);
}
Pseudo Coloring
void testPseudoColoring() {
  Mat gray = imread("xray.png", 0);

  Mat color;

  applyColorMap(gray, color, COLORMAP_JET);

  imshow("gray", gray);
  imshow("color", color);

  waitKey(0);
}
White Balancing
void white_balancing(Mat img) {
  Mat bgr_channels[3];
  split(img, bgr_channels);

  double avg;
  int sum, temp;

  for (int channel = 0; channel < img.channels(); ++channel) {
    sum = 0;
    avg = 0;

    for (int r = 0; r < img.rows; ++r) {
      for (int c = 0; c < img.cols; ++c) {
        sum += bgr_channels[channel].at<uchar>(r, c);
      }
    }

    avg = sum / (img.rows * img.cols);

    for (int r = 0; r < img.rows; ++r) {
      for (int c = 0; c < img.cols; ++c) {
        temp = (128 / avg) * bgr_channels[channel].at<uchar>(r, c);

        if (255 < temp)
          bgr_channels[channel].at<uchar>(r, c) = 255;
        else
          bgr_channels[channel].at<uchar>(r, c) = temp;
      }
    }
  }

  merge(bgr_channels, 3, img);
}

void testWhiteBalancing() {
  Mat image = imread("balancing.png");
  Mat balancing_result;

  balancing_result = image.clone();

  white_balancing(balancing_result);

  imshow("image", image);
  imshow("balancing", balancing_result);

  waitKey(0);
}